How to Avoid Candle Tunnelling
Aside from making your room smell good, scented candles can also add to the overall look of your living space. Most probably, you know that candles can be the perfect coffee table accessory or accent decor for your room.
And if you’re like us who also take pleasure at looking at your candles, you might be wary of one thing that could make your scented candle unsightly: candle tunnelling.
As a candle lover, it’s something that you would want to avoid.

Not only does it look bad, but it also means you're not getting the full burning and scent potential of your candle. This is why we've put together this handy guide to help you avoid the dreaded candle tunnelling.
What is candle tunnelling?
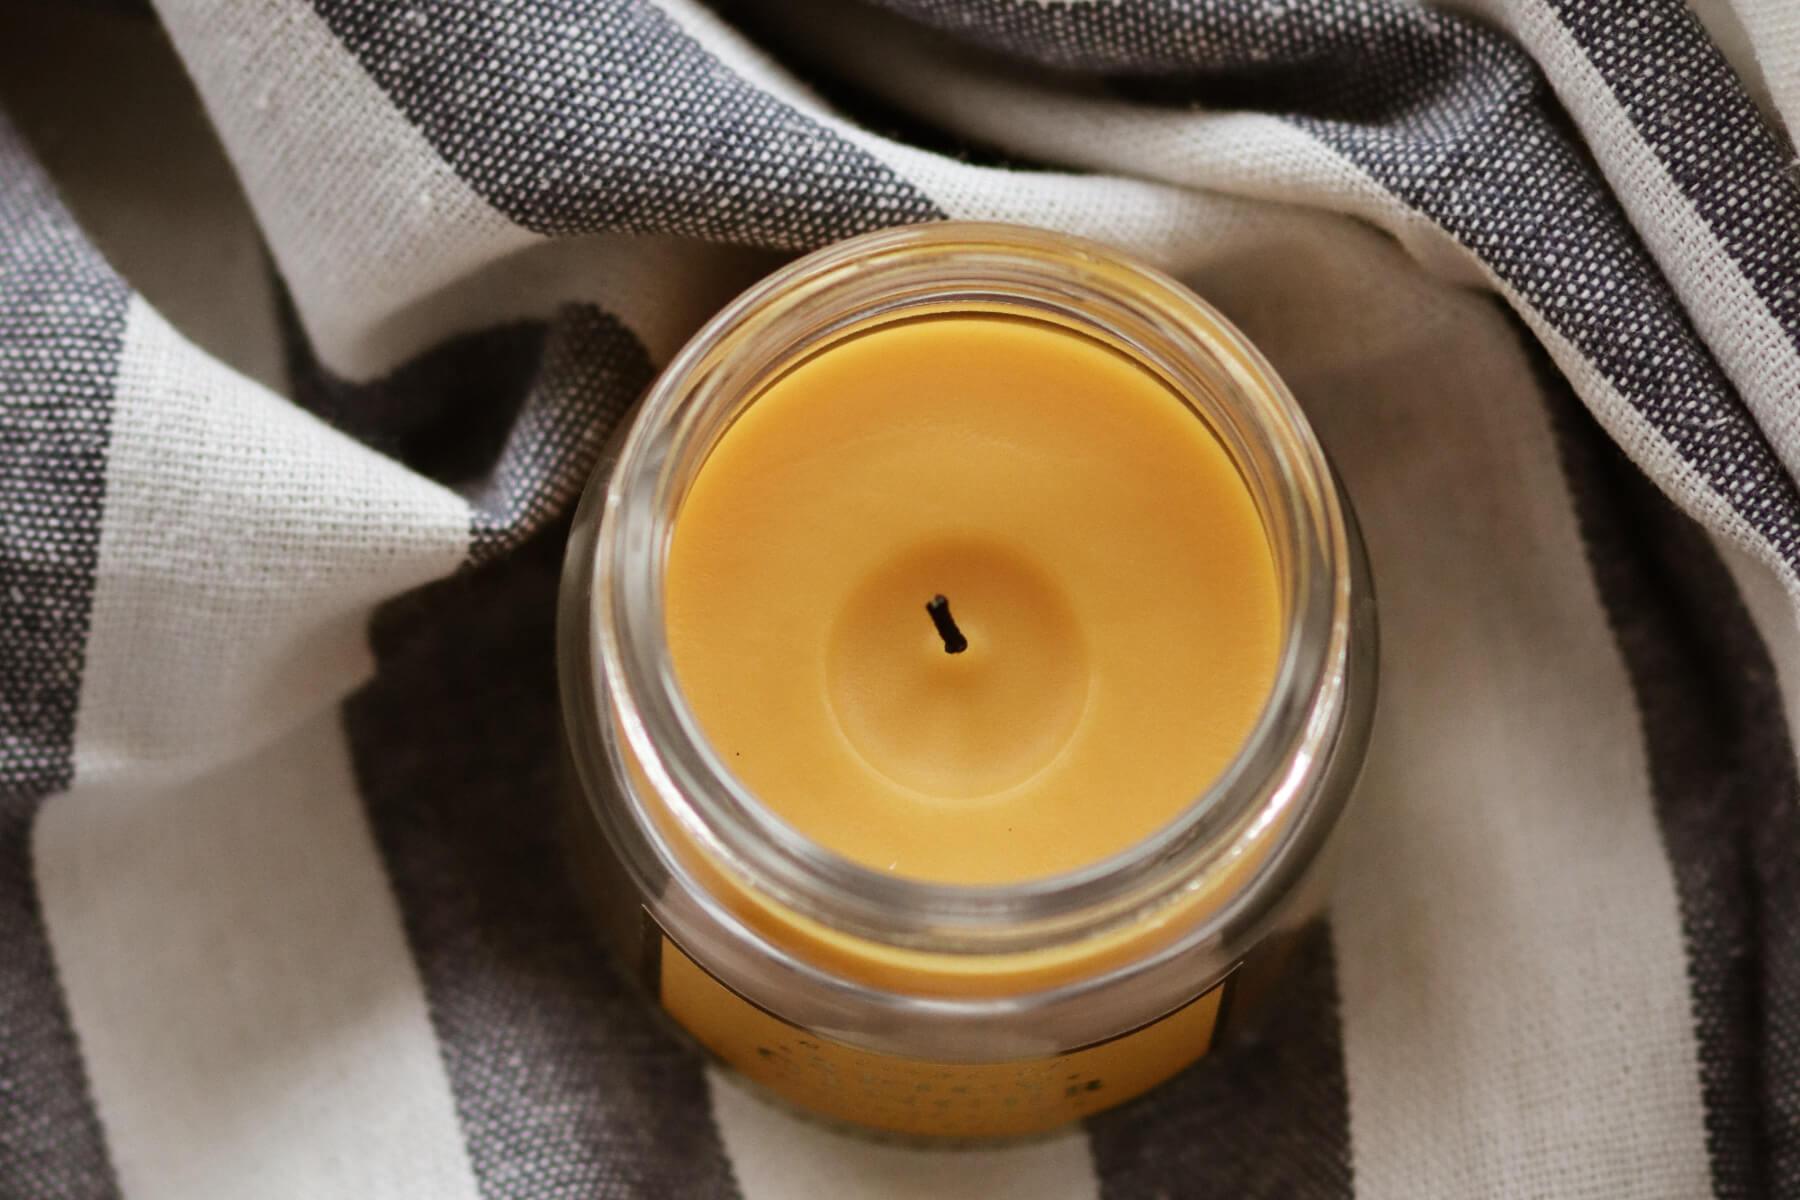
Candle tunnelling occurs when the centre of your candle burns out and is left with a hard wax ring around the outer edge.

Photo by Jo Petzer | Mockup Scene from Mockup Scene
As a result of this wasted wax, your candle will not burn as long as its maximum burn time.
When the flame penetrates deeper into the candle's centre, the wick will become increasingly difficult to light, and it will eventually be submerged in melting wax.
All candles are susceptible to tunnelling, regardless of quality or price.
The good news is, your scented candles can burn evenly and last longer with the minimum amount of wax left behind if you follow a few simple steps.
Prevent candle tunnelling
It all starts with the first burn…
How you light your scented candle for the first time sets the tone for how well it will function over its lifespan.
The most important thing to remember for the initial burn is to make sure the pool of melted wax reaches the candle's edges before snuffing the flame. It’s good to allow the wax pool to be about 1cm deep at the edges before you put it out.

The length of time this takes is determined by the candle's diameter.
If you just have an hour to enjoy your scented candle, choose one that isn't too wide. A huge three-wick candle, on the other hand, is a terrific choice if you have half a day to rest in the ambient of your new aroma.
You can also read our other article if you want more tips on what to look for when buying candles.
Generally speaking, we recommend trimming the wick before lighting a candle.
If your new candle is particularly wide, the wick may need to be left a bit longer than usual to prevent candle tunnelling. This will result in a larger, hotter flame that has a better possibility of melting the wax to the edge.
Just make sure you keep an eye on the flame and put it out if any problems occur.
Initial Burn Times & Candle Widths
Keep in mind that this is only a guide. As a general rule, it’s among the best practices for scented candles to burn until the melted wax pool reaches the edge of the container.
| Candle Width | Approx. First Burn Time |
| 1inch (2.5cm) | 1 Hour |
| 2inch (5cm) | 2 Hours |
| 3inch (7.5cm) | 3 Hours |
| 4inch (10cm) | 4 Hours |
What you should remember for the first burn:
- When you first light the candle, allow the wax pool to reach the candle's edges.
- For every inch the candle is wide, burn it for about an hour.
- Only trim the wick to 8mm before the first burn if the candle is excessively wide.
- To maintain the wax open and even, it's important to repeat this technique every now and then.
How to resolve candle tunnelling
If your candle has already begun to tunnel, there’s no need to worry. It's possible that you can still save it. If the candle tunnelling is not that severe, a hairdryer can be used to blast the top of the candle.

Photo by Jupiterimages from Photo Images
The wax will melt and smooth out as the hot air passes over it, making it more levelled. To prevent this from happening again, follow the directions for the first burn and melt the entire first layer of wax completely.
You can also use the oven if the hairdryer isn't working.

Photo by Jupiterimages from Photo Images
Preheat the oven to 175 degrees F, then lay the candle on a baking sheet and bake for about five minutes.
If you have a smaller candle, you'll need less time, and if you're dealing with a larger one, you'll need more. Turn on the oven light to keep an eye on the candle and ensure it does not become too heated.
If the candle tunnelling has gone deeper than a few millimetres, you might need to consider the foil method.
The Foil Tent Method

Photo by soupstock
The foil method is intended to increase the heat trapped at the top of the candle, allowing the stubborn hard wax left up the sides to melt.
To do this, light the candle and then cover it with an aluminium foil tent. Make a hole at the top to let the smoke out. The foil will reflect heat back onto the candle, melting the wax all around it rather than just in the centre.
When the wax has completely melted, carefully remove the aluminium foil using an oven mitt or other heat-resistant protection and blow out the candle.
It's a simple method, but make sure to proceed with caution – the foil can become hot, so be careful not to burn yourself.
Also, don't use this method for long periods of time because the increased heat can put a strain on the candle container, potentially causing it to shatter.
When candle tunnelling is really bad
In some cases, you might have to admit that the candle tunnelling may be too severe.
While this is disappointing, it still does not rule out the possibility of enjoying your candle. You can try using a candle warmer instead. When it comes to appreciating scented candles that can no longer be lit, it's your new best buddy.
A candle warmer is a type of electric heater that melts candles and releases the fragrance notes without using a flame. It softly heats the wax, allowing the aroma to escape into the room, and is designed to be used with container candles.
Another option is to use a tealight oil burner.
To use a tealight burner, just remove the scented wax from an unwanted candle and place it on the burner's top. Make sure not to add water to the wax! Then, in the burner's base, add a lit tealight and allow the flame to heat and melt the wax above, allowing it to diffuse the fragrance.
Candle tunnelling can be annoying, but keep in mind that it can be avoided. Now that you know these tips, you'll be able to keep your candles tunnel-free and burning perfectly for hours on end!
Shop for Scented Candles in Singapore today.